4.The stand, sponge and metal cleaner
When you are soldering, from time to time you need to lay down the soldering iron. In order to not melt something, not set something on fire and not burn yourself, it is good to have a stand for your iron.
In soldering stations usually either there is an integral stand or one added to the set which allows you to safely set the iron aside. If you have a separate soldering iron, then it might be a good idea to buy one.
There are many shapes and kinds, but as long as holding part is made of metal and its base is made from something not conducting heat - usually plastic - it doesn't really matter what specific type of stand you choose. It is rather a quite simple construction, most soldering irons have similar shape fitting most stands well ;P
If you do have a soldering station, buying a brand stand for the station might be good, because such stand might fit well to openings in the station for attaching it, but in such cases the stand usually will be already in a set with the station. The cost of a stand is a few PLN/EUR/USD so it isn't a huge expense.
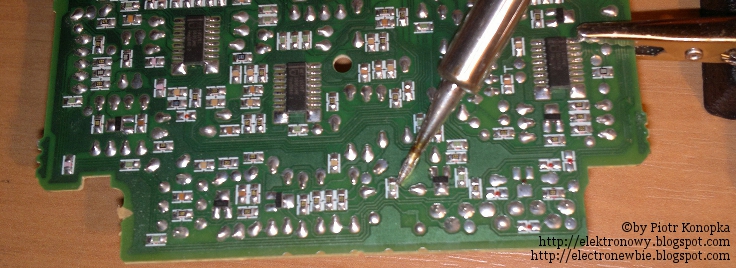
 |
My soldering station - a stand with the iron set on it and in the base of stand there is a metal cleaner/scrubber visible. |
Sponges made of various plastics usually slightly melt leaving hard to clean residue on soldering iron bits while a 'professional' sponge costs just a few złotys/euros/dollars, even with a container/stand for it.
If you really want, you can try with a brass cleaner - scrubber for dish washing. It is quite similar (and a slight bit cheaper) to those sold in electronics stores.
Personally after trying it out, I recommend such metal cleaner - in my opinion it works much better than a sponge. It costs around 5-6PLN (1,4EUR/1,7USD), and with a separate stand for it around 15PLN (3,6EUR/4,6USD).
You use the metal scrubber by quickly dipping the tip in it and pulling it out a few times - lightly scratching off the impurities. You'll have a very clean, shiny bit in a moment.
The use of sponge - it has to always be really damp with water, almost floating in it. It is used by quickly dipping the bit in water and quickly pulling it out - the idea is for the rapid change of temperature to make the impurities crack and fall off, swept later by sweeping the iron on the sponge. You should do it as fast as possible, so that the iron doesn't get cooled down too much, or you'd have to wait for it to heat up again, because trying to solder with cooled down tip will end in a failure or soldering errors caused by not heating components well enough.
Uwaga: niektóre niedoświadczone osoby proponują oczyszczanie grotu przy pomocy drobnego papieru ściernego. Jest to kompletne nieporozumienie jeśli mówimy o normalnym czyszczeniu - robiąc to ściera się powierzchnię grotu, która zwykle jest zwykle zrobiona ze stali, żelaza lub innych metali czy stopów mających przedłużać żywotność grotu, jednocześnie odsłaniamy miedziane wnętrze grotu, które przez to znacznie szybciej zostanie zużyte w trakcie lutowania jako że miedź powoli rozpuszcza się w lutowiu w trakcie pracy.
Użycie papieru ściernego jest na prawdę ostatecznością - jeśli grot został przez nieodpowiednie użytkowanie zapieczony tak, że nie da się go już używać bo cyna nie chce do niego przylegać.
Warning: some unexperienced people propose the cleaning of bits with small grit sandpaper (even the quite smooth one like 600 grit). This is a complete misunderstanding if we're speaking of regular cleaning - by doing that, you abrade the surface of the bit, which usually is made of steel, iron or other metals or alloys which are there to make the tip last longer, and we expose the copper core of the bit, which will become used up much faster during soldering as copper slowly dissolves in solder during work.
Using sandpaper is really a last resort measure - when the bit has been by incorrect usage burnt so badly, that it can't be used anymore because tin won't stick to it anymore despite normal cleaning.
Possibly if you make your own bits for transformer soldering iron, you can more often treat it with sandpaper - if we're making them from copper, it'd be quite hard to expose that copper more ;P
In heater soldering irons however, especially with the prices of brand bits, cleaning them with sandpaper except for really extreme cases is simply just a waste because it shortens their lifespan greatly.
About how to not let the bit to be dirty enough to require such drastic measures I'll write in next posts concerning soldering techniques.
And in the next post more about the soldering bits and their types ;)
Next post: 2.4 Soldering - Basics - Soldering bits/tips
Previous post: 2.2 Soldering - Basics - Tin and rosin
Beginning: 1. Safety rules and hazards in electrics and electronics
No comments:
Post a Comment